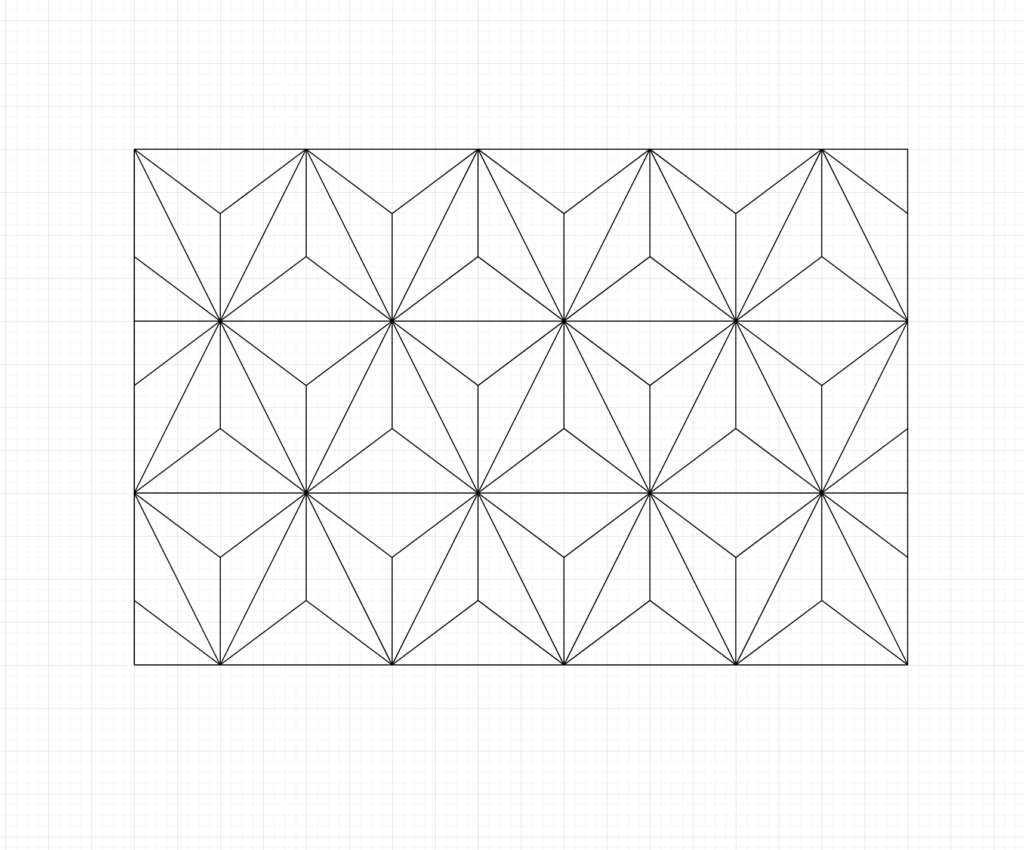
Asanoha Sashiko Pattern is our favorite pattern. It is also one of the most popular Sashiko Patterns stitched on the fabric now and in the past. Upcycle Stitches LLC often use this Asanoha Sashiko Pattern to teach what Sashiko is like in the workshops. In spite of its complicated look, it is one of the best patterns to practice Sashiko stitching.
Asanoha (=麻の葉) means the “Hemp Leave” in Japanese. The Japanese believed that the Asanoha pattern protects someone you care (especially children) from evil spirits. Therefore, we can find this pattern often on the children’s wear.
The process of drawing Asanoha Sashiko Pattern isn’t difficult once you get it. It is a bit challenging to explain the whole process just in writing. Please check the Youtube Video with me drawing and explaining together. It isn’t as difficult as it looks.
The tools you would need are also simple.
- Ruler
- Graph Paper (If you are drawing on the paper)
- Chalk pencil or marker.
How to draw Asanoha Sashiko Pattern
(From Sashi.Co Youtube Channel)
Step.1 | Parallel Lines
First, you need to set the “Interval” of the lines. It decides the size of the Asanoha Pattern. The easiest length I find is 2 inch, so let’s go ahead to draw the parallel lines with 2-inch intervals like the image below.

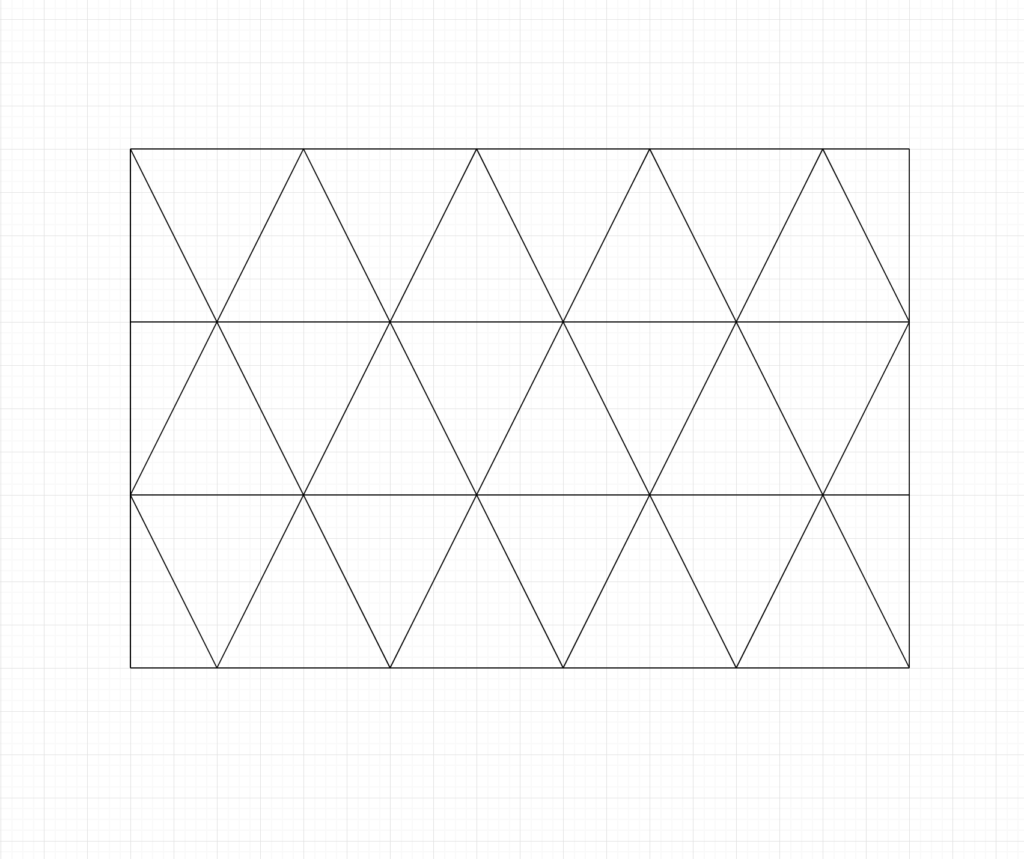
Step.2 | Diagonal Lines
Draw the diagonal lines like the image below.
The key is that each point where the lines are crossed is 2-inch interval as well.
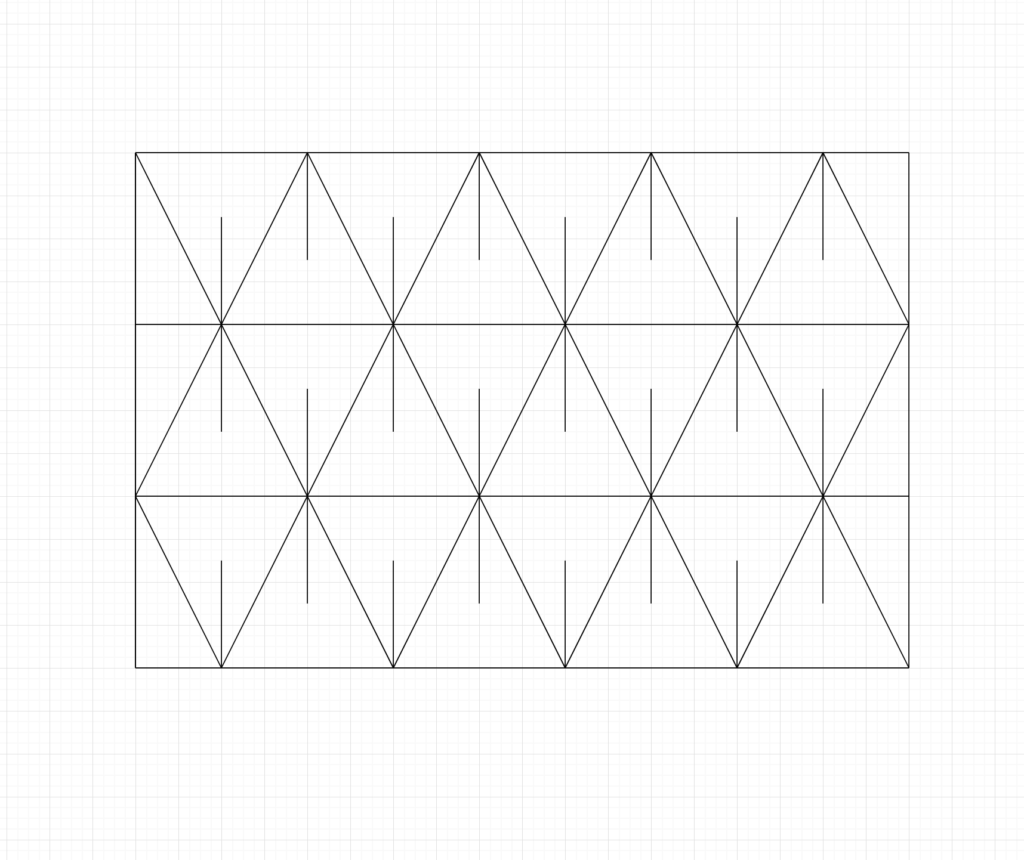
Step.3 | About 70% of lines
From all the crossing points, draw the 70% of the set interval length (2-inch for this example), upper and lower both ways as the image below shows.
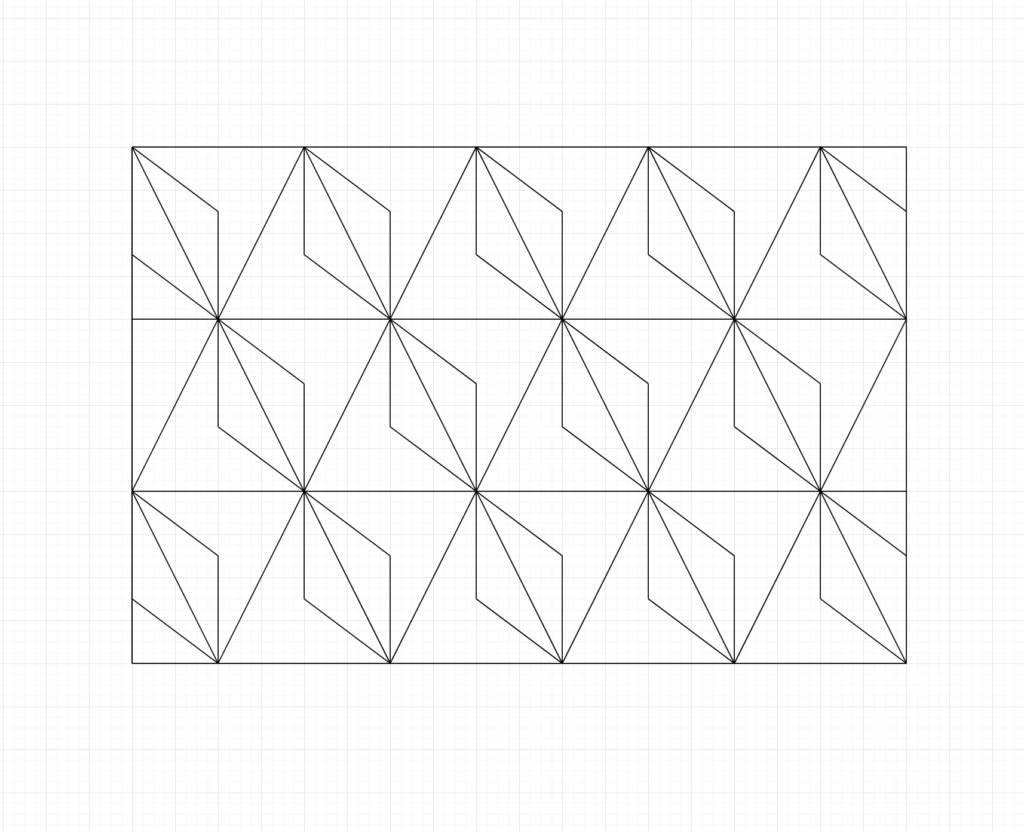
Step.4 | Connect the ends of each lines
Connect the end of 70% length of lines you made on Step.3 and the all the crossing points.
Step.5 | Complete the Asanoha Sashiko Pattern
After Step.3 and Step.4, you would start seeing the Asanoha Sashiko Pattern. It isn’t that difficult to complete once you understand the procedure until the Step. 3
